
Building a dock on your property can add both value and function, offering a spot to gather, launch small boats, or just relax by the water. Many people consider going the do-it-yourself route to save money or have more input into the finished product. As someone who has weighed these decisions before, I know the choices can feel overwhelming, especially if you’re new to dock construction. I’ll break down the realistically helpful pros and cons so you can decide if DIY dock construction matches your needs and abilities.
Understanding DIY Dock Construction
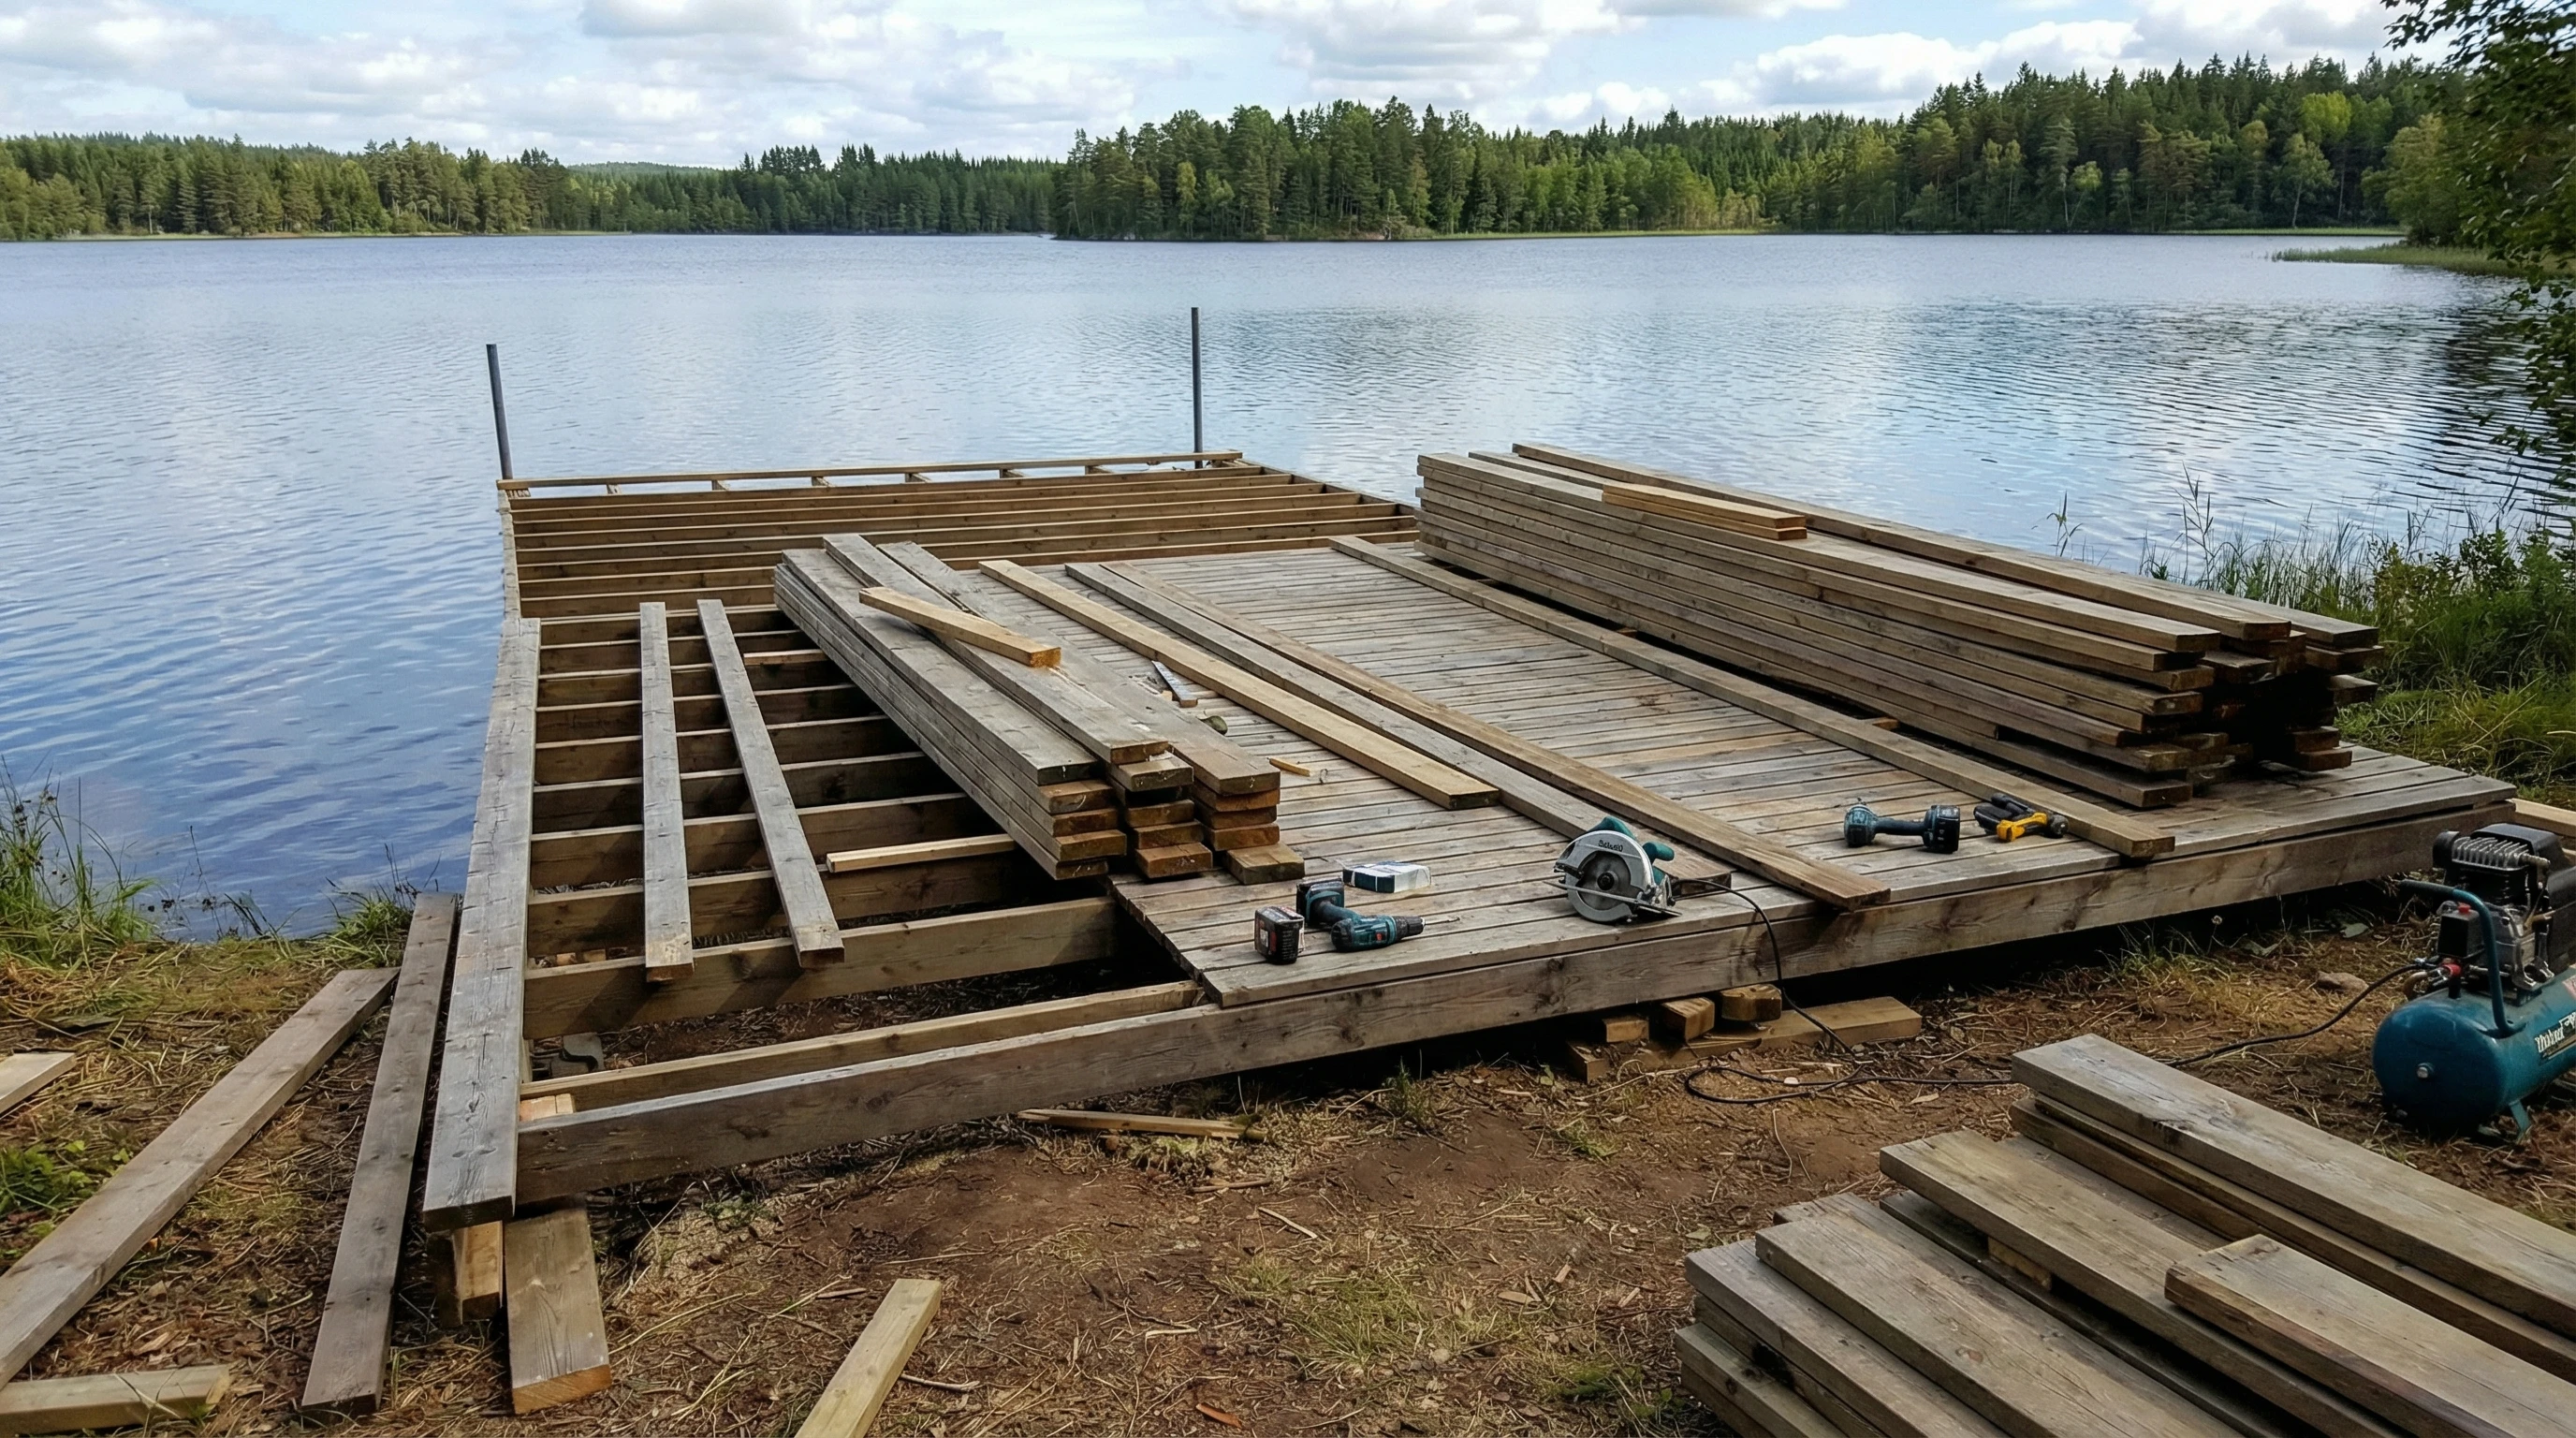
When I first started researching DIY dock projects, I found that there are several types to consider. Floating docks, stationary docks, and even modular kits each bring their own set of requirements. Every project requires planning, some technical knowledge, and the ability to work with tools and building materials. Most DIYers choose this path for a sense of accomplishment and to save on costs, but the process may take longer than expected and also comes with some notable challenges.
Dock building generally requires permits, especially in areas with environmental or shoreline regulations. Reviewing local guidelines before buying materials helps avoid headaches later. Also, weather and timing play major roles. Setting posts into the lakebed or assembling floating platforms is much smoother in calm, dry weather, while trying to build during storms can add unexpected delays.
DIY Dock Building Basics: What You Need to Know
There’s much more to building a dock than hauling wood to the water’s edge. I found that planning and layout are key first steps. A well-designed dock fits both your intended use and the unique shoreline. Here are a few basics to help get you started:
- Dock Design: Decide between floating or stationary models. Floating docks use pontoons or barrels, while stationary docks require posts anchored into the lakebed.
- Permits and Regulations: Double-check if you need permission from local authorities or environmental agencies. Inspections might be required before, during, and after the build process.
- Materials and Tools: Pressure treated lumber, composite decking, galvanized fasteners, anchors, floats, saws, and drills form the core kit.
- Skill Level: Some experience with basic construction and tools makes the project smoother, but guides and online tutorials can help newcomers learn as they go.
It’s a good idea to sketch a simple plan with rough measurements to make material lists and budgeting easier. Visiting nearby public docks to look at different designs can also give inspiration and ideas for what works best in your area.
The Upsides of DIY Dock Construction
I’ve met plenty of people who are proud of a dock they built themselves. Doing the work on your own brings a real sense of satisfaction. There’s flexibility in adapting the design to your vision, picking preferred materials, and working around your schedule. Here are the main benefits:
- Cost Savings: Labor costs make up a big portion of professional dock construction. Handling the work yourself means real savings if you have the time and tools.
- Customization: DIY lets you choose dimensions, deck materials, and addons like benches, ladders, or kayak racks. This is especially helpful if you have unique needs or shoreline conditions.
- Learning and Confidence Boost: Completing a big project like a dock feels rewarding. Hands-on work builds new skills that carry over to home repairs or other outdoor projects.
- Timeline Control: You decide when to get started, pause, or finish up, instead of working around a contractor’s schedule.
- Personal Growth: Each phase of construction is a new opportunity to learn. Building from scratch strengthens your problem-solving abilities and increases self-reliance. For families, getting kids or partners involved can turn the project into a memorable team effort.
Drawbacks and Challenges to Consider
Tackling a dock project by yourself sounds exciting, but there are a few downsides. I’ve run into these obstacles more than once and know how frustrating they can be. Here’s what to watch for:
- Time Commitment: Even a simple dock can take several weekends to complete, especially if you’re working alone or learning as you go. Weather delays and supply runs can stretch out the timeline.
- Technical Skills Needed: Cutting, leveling, anchoring, and assembling large structures can be challenging for beginners. Mistakes with measurements or fasteners could lead to unsafe or uneven docks.
- Equipment and Tool Costs: If you don’t already have saws, power drills, or specialty tools, those purchases can add up. Renting larger equipment like augers for posts might also be required.
- Physical Labor: Lifting lumber, securing posts, and working near water takes effort and can be physically demanding. Safety is really important around slippery areas or power tools.
- Permit and Legal Risks: Skipping permit requirements or violating shoreline rules can lead to fines and forced removals. Research and paperwork take extra time in the beginning.
- Unforeseen Costs: Sometimes, price increases for materials or unexpected issues with water depth can increase your expenses partway through the project.
Common DIY Dock Types
Picking the right style makes the rest of your planning a lot easier. I’ve built two types and learned that the right match depends on shoreline, water depth, and intended use. Here are the top three most common DIY dock types:
- Floating Docks: These docks use airtight barrels or pontoons to stay above water. They work best in deep lakes or areas with fluctuating water levels and are popular because they’re relatively easy to remove or adjust.
- Stationary/Piling Docks: Built on posts sunk into the lakebed, these docks provide a steady platform. They work well in shallow, stable waters but are harder to move if needed. If building on a river, look for pile driving tips to help set posts firmly.
- Modular Dock Kits: Prefabricated kits have become a practical option, combining convenience with customization. These are a helpful option for anyone less comfortable designing from scratch or sourcing each material. Kits now come with instructions and support, making assembly less intimidating for first timers.
Problems That Often Come Up (And How I Deal with Them)
Most DIY dock builders will hit at least a couple of setbacks during the process. I always try to have a backup plan to avoid getting stuck. Here are some common hiccups:
- Planning & Permitting Snags: If paperwork or approvals slow you down, call your local building office for direct answers instead of searching for hours online. It’s usually faster and more reliable.
- Running Short on Supplies: Double your material estimate for hardware like bolts, brackets, and fasteners. It’s easy to miscount these, and having extras is helpful for future repairs, too.
- Weather Delays: Try to start early in the season, keeping a flexible schedule. Store lumber and tools properly to prevent damage during sudden storms or rain.
- Difficulty Level: Tapping into how to guides, local docks, and even YouTube videos can help when you feel stuck. I’ve gained a lot by asking questions at local hardware stores, too.
- Assembly Errors: Don’t rush cutting or drilling. Take a moment to double-check your measurements to keep things level and safe.
Permit and Legal Concerns
Permitting can be one of the trickier steps. Local laws often require you to submit plans for approval, especially if the dock affects public water, fish habitats, or shoreline erosion. Inspections might be needed before construction begins and after the work is done. Following these guidelines means you avoid penalties or being told to remove the dock later.
Lifespan and Maintenance Realities
I’ve noticed that even well-built docks need regular checks. Floating docks might require yearly adjustments to stay level, and stationary docks should be inspected for shifting posts or deck boards that become loose. Treating wood with the right sealant and replacing corroded hardware will help your dock last through many seasons. Make a habit of walking the dock each spring to spot loose nails, wobbly railings, or cracked floats early, which can prevent bigger repairs down the road.
Helpful Tips for DIY Dock Building
After a few builds, I picked up advice I wish I’d heard sooner:
- Start Small: If this is your first dock, consider a simple floating platform before trying a large stationary build. This helps you practice skills and get comfortable working near water before tackling bigger projects.
- Focus on Fasteners: Galvanized or stainless steel hardware is worth the extra cost. It resists rust and holds up longer in damp environments. Skimping on parts will only lead to headaches later.
- Double-Check Deck Height: Water levels change over time, so allow for extra height to stop boards from being underwater after big storms or snowmelt. A little extra clearance protects both the dock and those using it.
- Plan for Add Ons: If you think you might add a boat lift, railings, or lighting later, reinforce those areas ahead of time or install extra blocking as you go.
- Safety First: Always wear a life jacket when building on or over water, especially if you’re working alone. Non-slip shoes and eye protection are also important for safe construction.
Real-Life Dock Applications
The right dock can be the highlight of a lake or river property. I’ve built docks for fishing, kayak launches, and simple swimming platforms. Friends have customized theirs for evening gatherings or boat storage. A strong, well-anchored dock also creates great value if you ever consider selling your home.
- Fishing Platforms: Add benches and rod holders to keep things organized. Shade umbrellas or shelters can make long fishing trips more comfortable.
- Family and Entertaining Spaces: Wider decks give room for chairs and small tables. String lights or built-in seating can make these docks a perfect summer hangout spot.
- Watersports Launch Area: Railings, steps, and tiedowns make launching canoes and paddleboards safer and easier. Consider adding rubber mats or textured surfaces for extra safety if kids use the dock for swimming and jumping.
Frequently Asked Questions
These are some common questions I hear about DIY dock construction:
Question: Is DIY dock construction really cheaper than hiring a pro?
Answer: For those with experience and basic tools, most of the cost savings come from skipping labor fees. But special tools, permits, or correcting mistakes can narrow the savings if you are learning as you go.
Question: How do I decide between a floating or stationary dock?
Answer: Consider the water depth, lakebed type, and seasonal changes in water level. If your area has big changes in water level, a floating dock makes more sense. Steady, shallow water is better suited for permanent posts.
Question: What’s the best wood for a dock?
Answer: Pressure treated lumber is the most common, but cedar and composite products are increasingly popular. All materials need proper treatment and fastening to hold up over time near water.
Final Thoughts
DIY dock construction can be a worthwhile project for people who are prepared and eager to learn new skills. By weighing the pros and cons, planning ahead, and paying attention to challenges, you can create a dock that fits your needs for years to come. If you value the experience and customization that come from doing it yourself, building your own dock could be the right move. Remember, preparation and persistence go hand in hand toward making your waterfront space everything you envision.